Roster&attendance
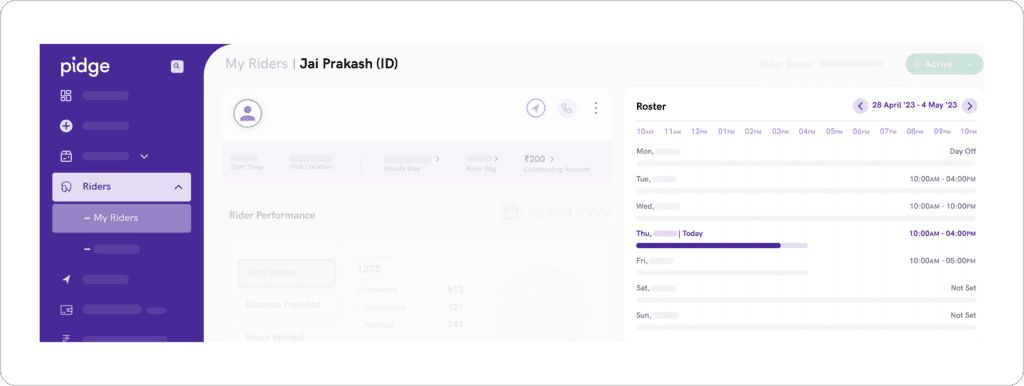
- From the sidebar, open the ‘My Riders‘ page under the ‘Riders‘ tab. On this page, you can view a list of all your business riders.
- Click on the rider’s name whose attendance you wish to see. This will open the ‘Rider Performance‘ page.
- On this page, under the ‘Roster‘ section, you can view the rider’s attendance for the current week.
- To view the roster for previous and upcoming weeks, use the arrows at the top right of the section
To check a rider’s current day/daily attendance, you have three options:
- From the sidebar, click on the ‘Search‘ button. Select ‘Rider‘ from the dropdown menu and enter the rider’s name or ID.
- This will open the Rider Overview box where you can see the shift time and login time for the current day in the ‘Roster & Attendance‘ section.

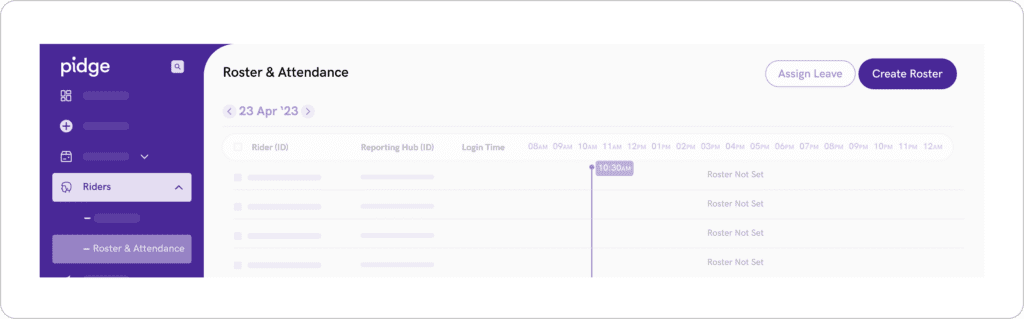
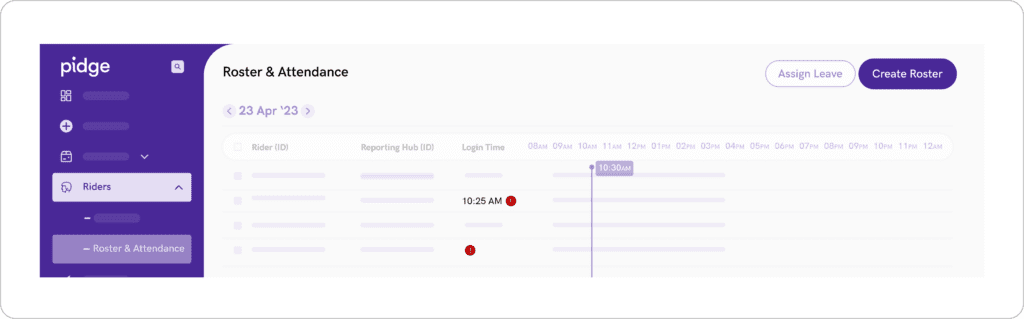
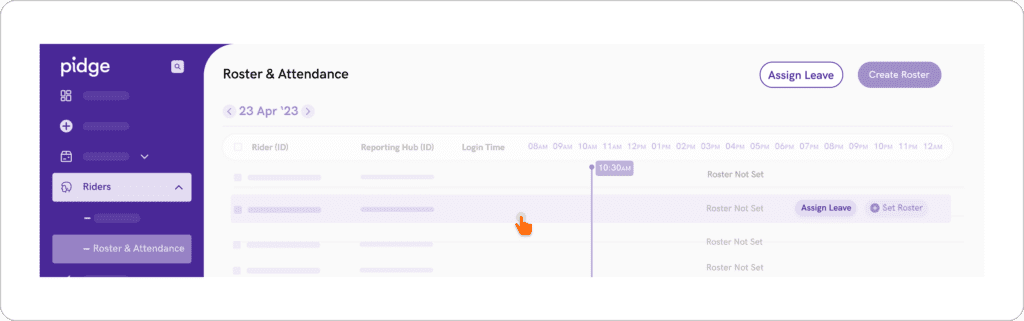
- From the sidebar, open the ‘Roster & Attendance‘ page under the ‘Riders‘ tab. On this page, you can obtain a quick overview of the login and shift times for each rider listed.
- The presence of a red alert icon next to the login time indicates a late login. In the case of an absence, only the red alert icon will be displayed.


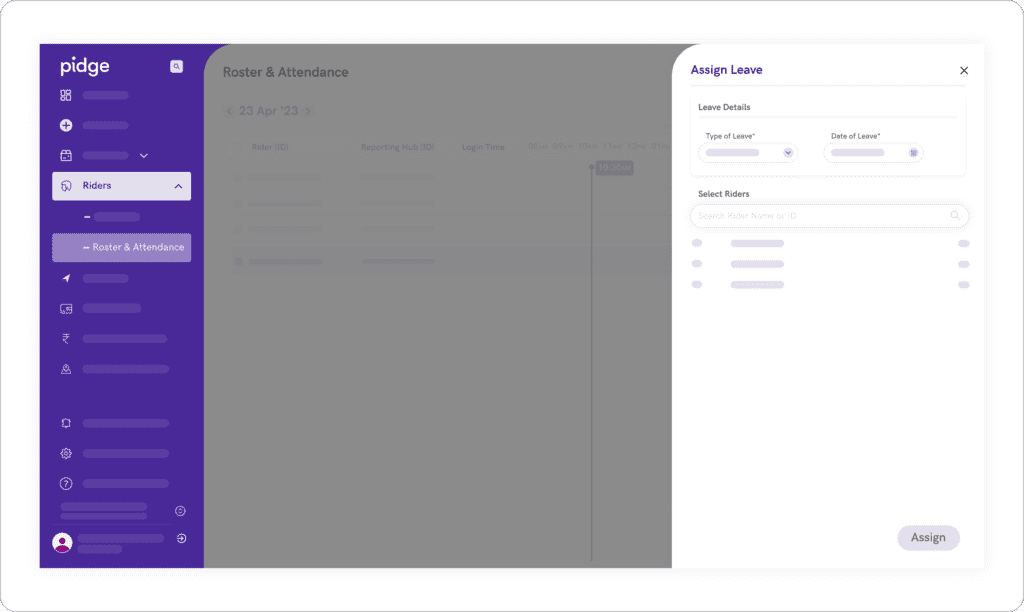
- On the ‘Roster & Attendance‘ page, click on the ‘Assign Leave‘ button. To assign leave to a single rider, hover over the rider’s name and then click on the ‘Assign Leave‘ button.

- Please complete the necessary details, including the type of leave and the date of leave. Add riders by their name or ID, and then click on the ‘Assign‘ button located at the bottom right

- Note – Leaves cannot be assigned if the rider’s roster is already scheduled for that particular date. To assign leave, you must first remove the existing roster for that date.
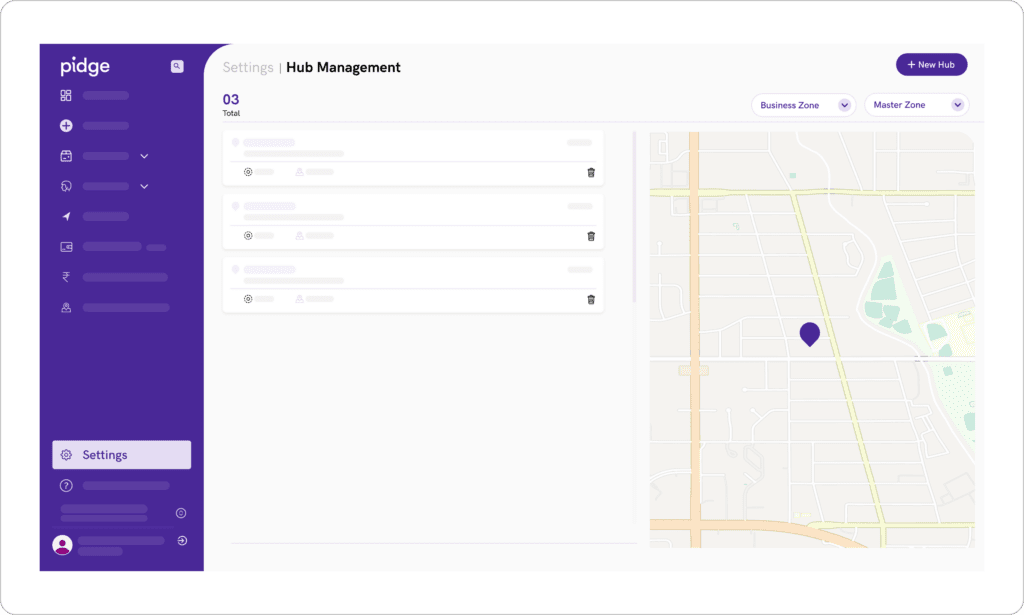
- Open the Settings page from the sidebar. On this page, click on ‘Hubs‘ under the ‘Location & Addresses‘ section.
- Once you’re on the ‘Hub Management‘ page, click on the ‘Create Hub‘ button to access the hub form.
- Proceed to fill in the address, hub name, and the allowed distance. (This distance, measured in meters, represents the range within which your rider can log in for their shift).
- After filling in the details, click ‘Next‘ to add the hub.

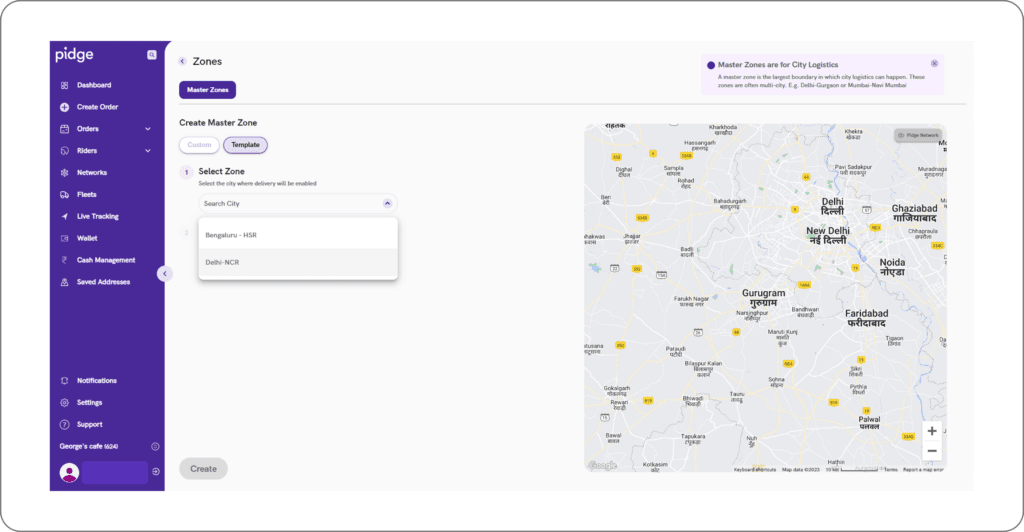
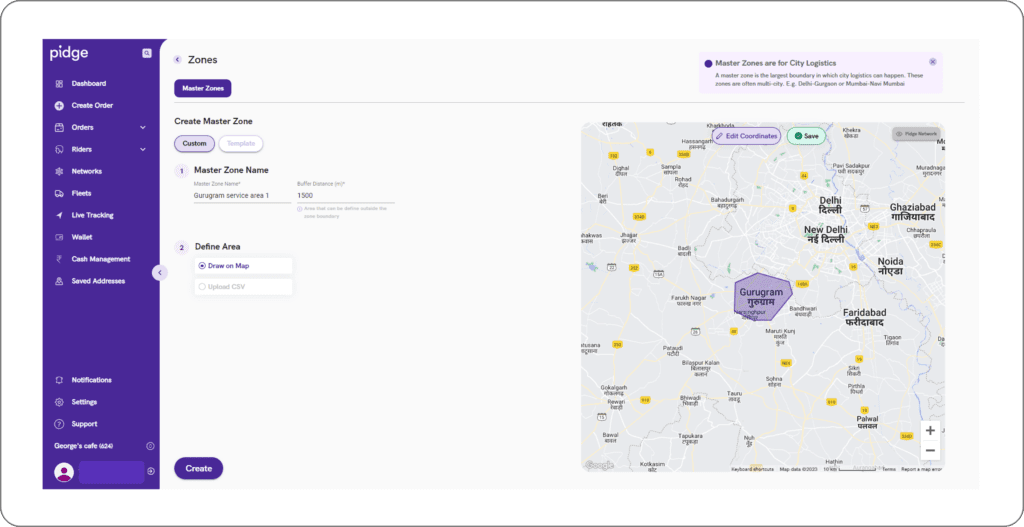
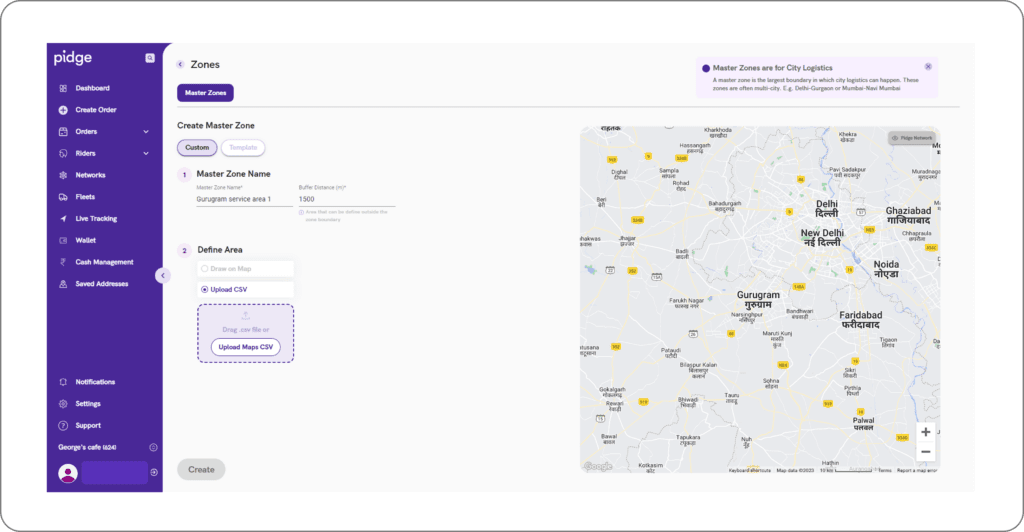
- Open the Settings page from the sidebar. On this page, click on ‘Zones‘ under the ‘Location & Addresses‘ section.
- Once you’re on the ‘Zones‘ page, you get the option to ‘Create Custom Zone‘ or ‘Choose from Template‘.
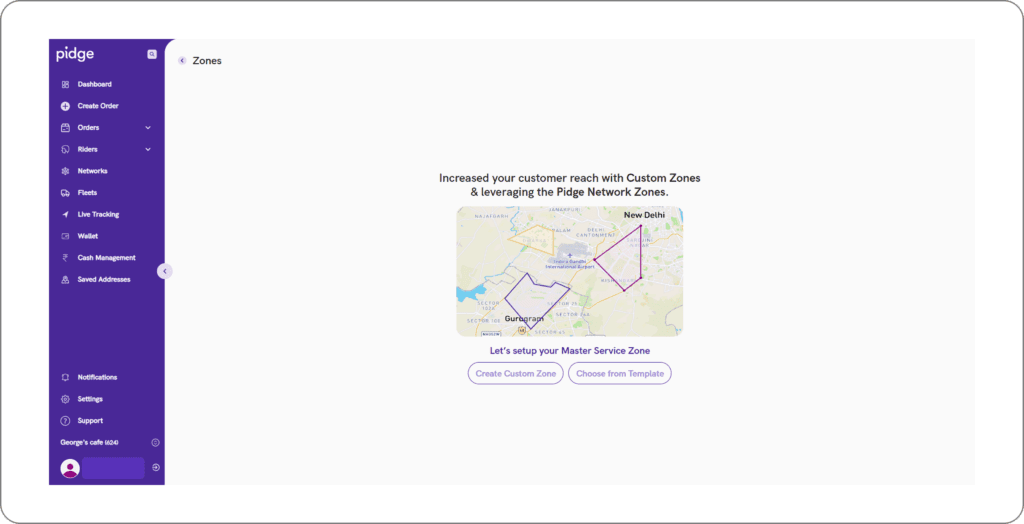
- If you choose to ‘Create Custom Zone‘, you can set it up either by drawing your serviceable area on the map or by uploading a CSV or your serviceable pin codes.
- If you select ‘Choose from Template‘, you can select the zone from the drop down menu and create the serviceable accordingly.